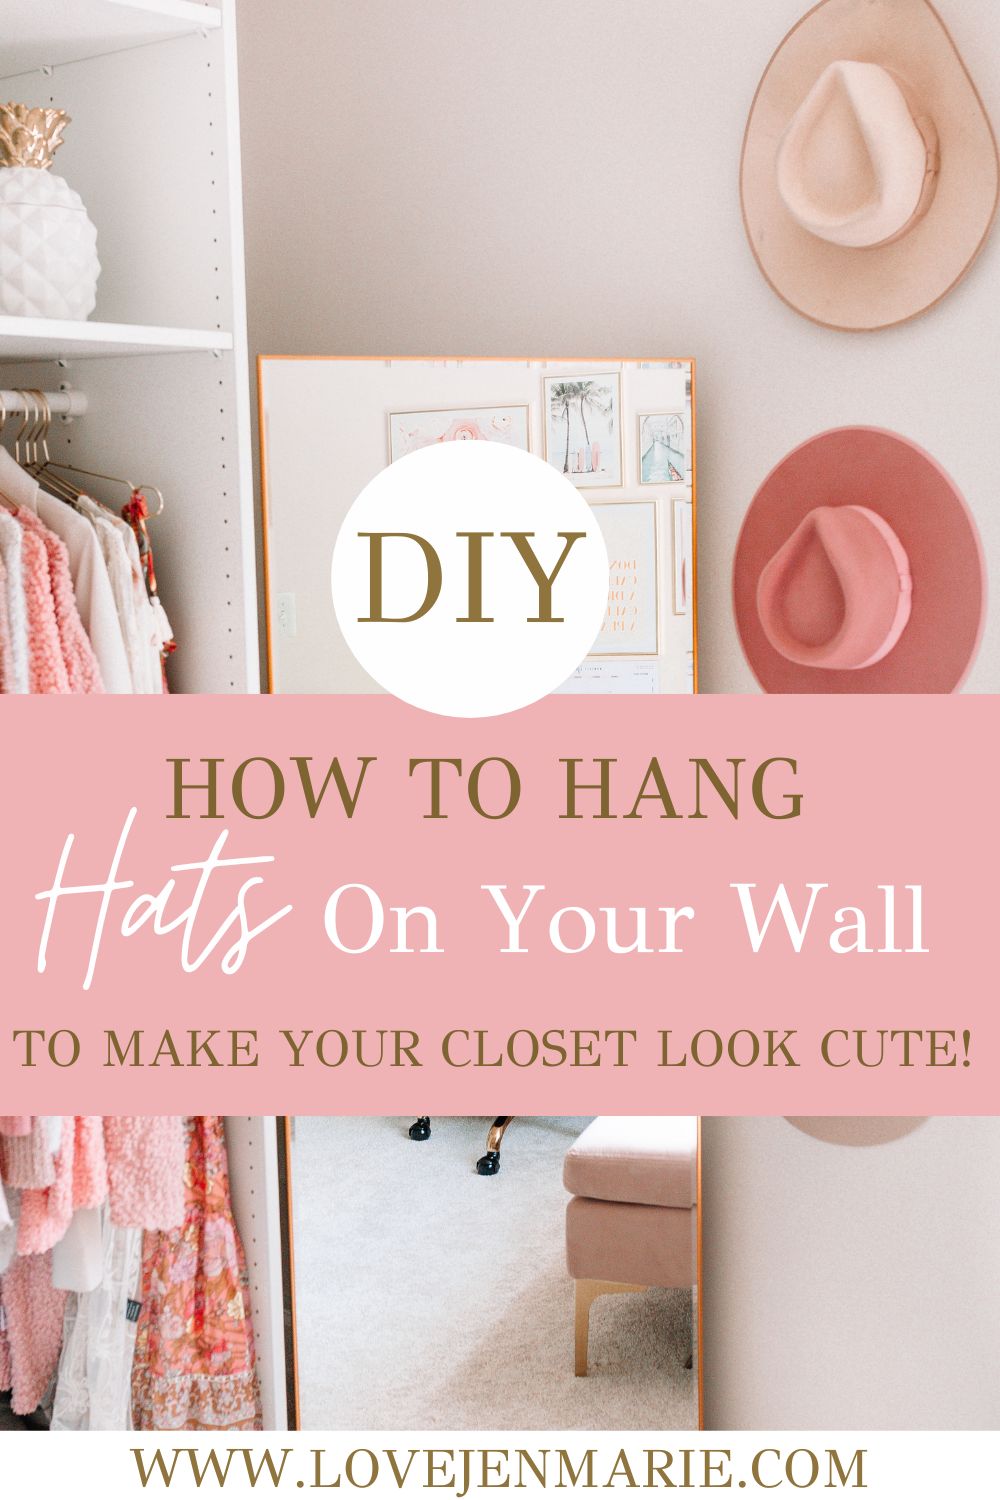
Hats are great for more than just keeping your head warm—they can also be a great way to add a little personality and style to an outfit. But if you’re like most people, you probably have too many hats and not enough places to store them. So why not turn your hat collection into a stylish display with a DIY hat wall gallery? With some basic supplies and a few simple steps, you can create an eye-catching display that will make organizing your hats easier than ever. Let’s get started!
Gathering Supplies
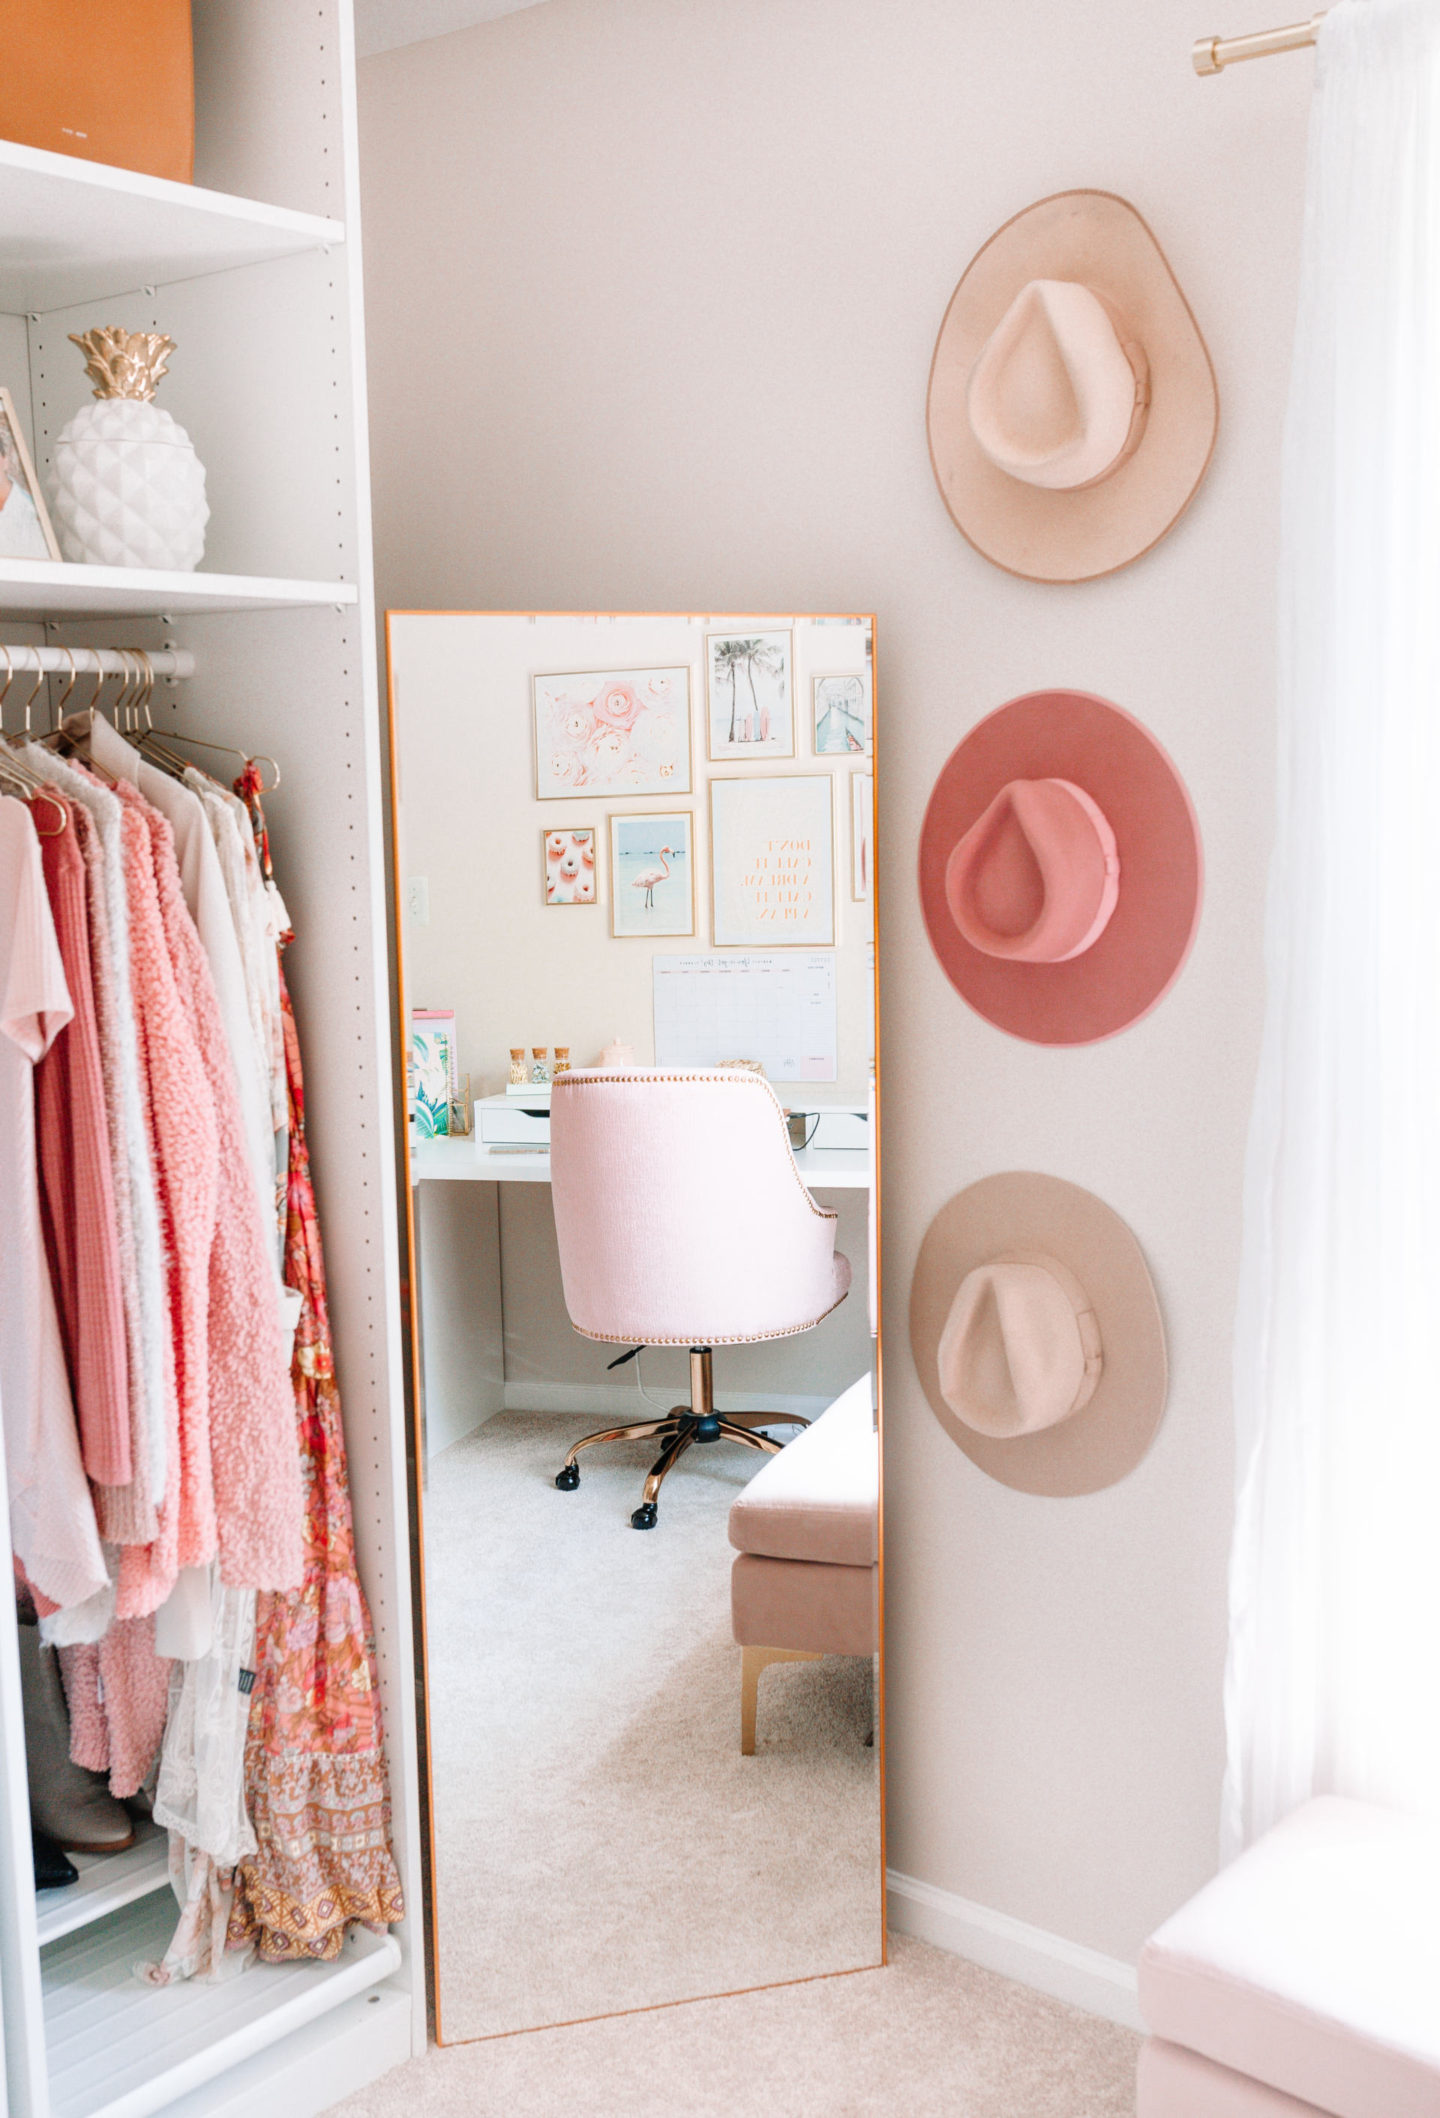
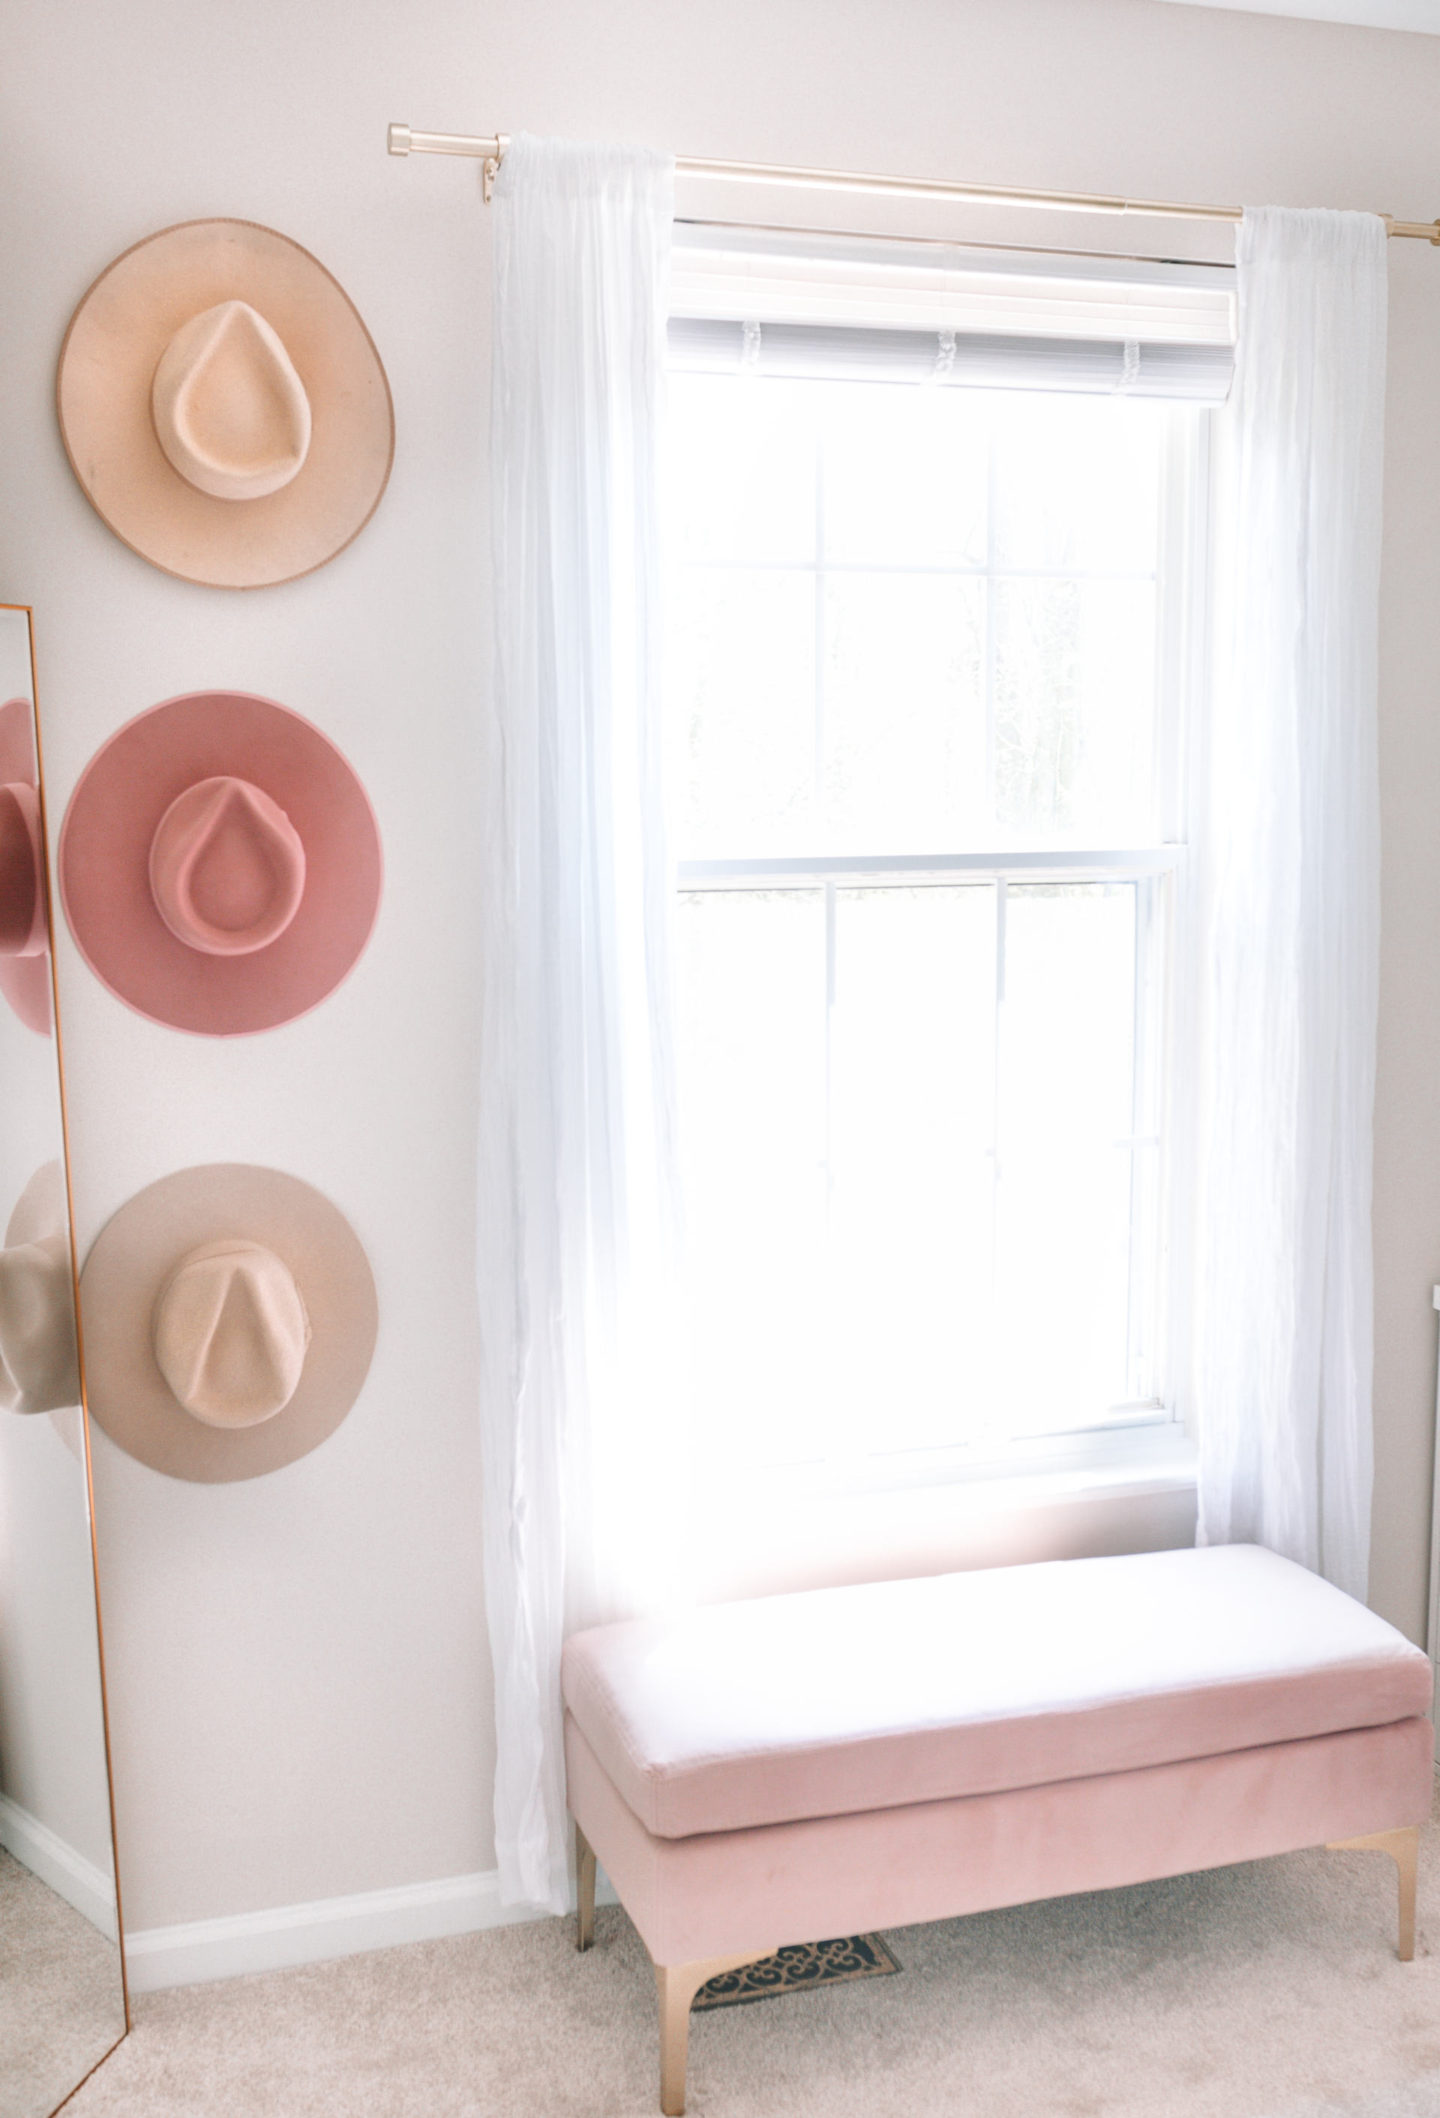
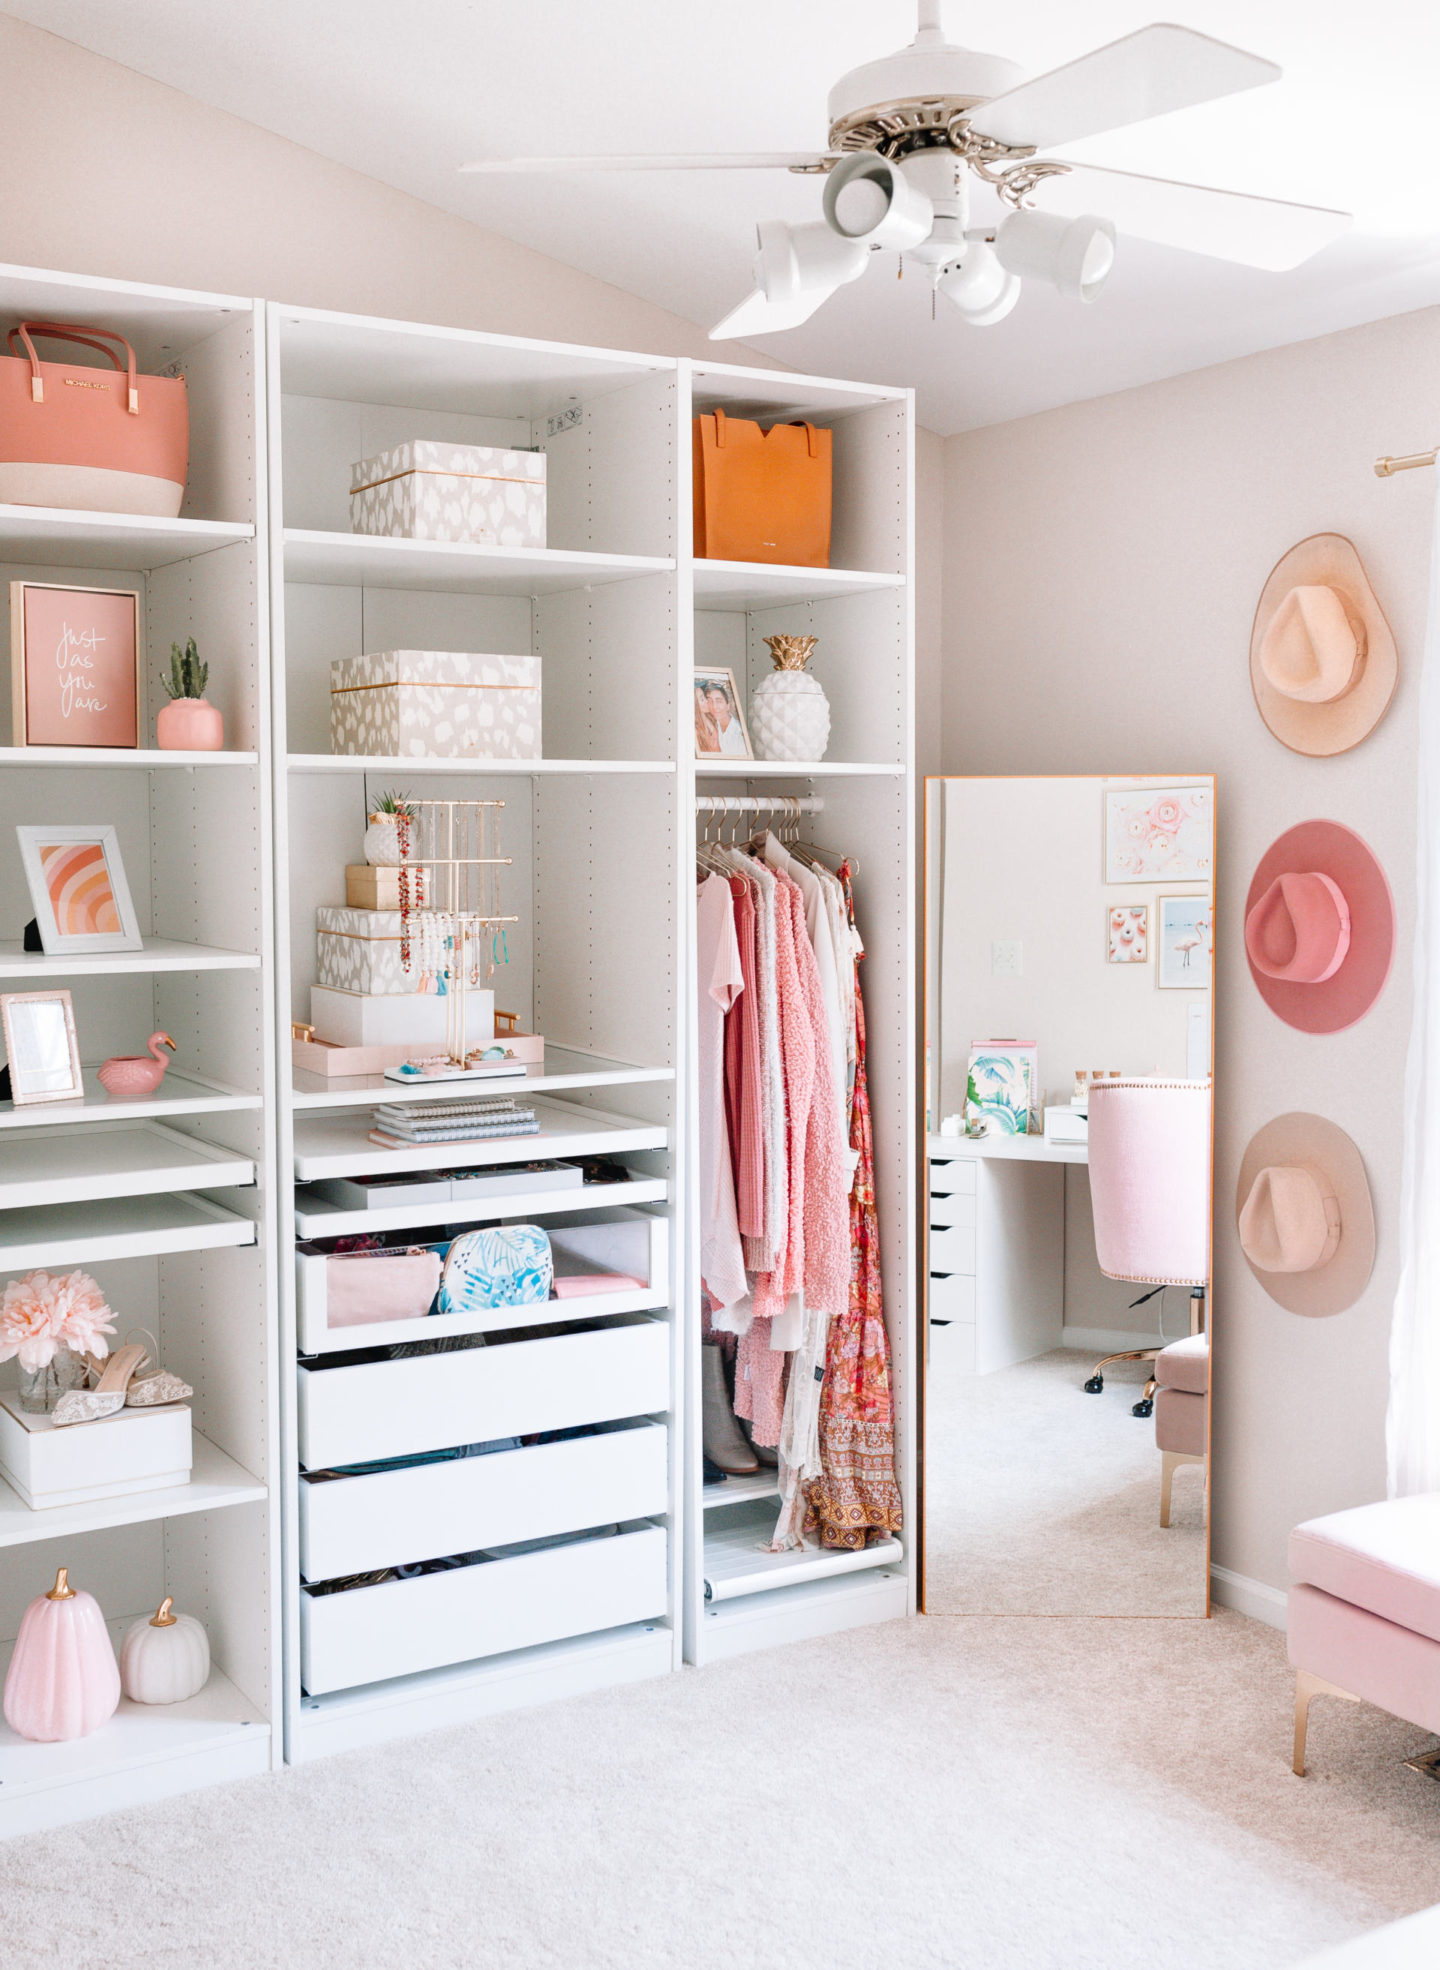
The first step in creating your DIY hat wall gallery is gathering the supplies you’ll need. You’ll want to start with some wall-safe adhesive or mounting putty and small Command hooks or cup hangers. You may also want to pick up some decorative ribbon for hanging the hats, but this is optional. The exact supplies will depend on where exactly you plan on hanging your hats — whether it’s a closet door, bedroom wall, or hallway — so make sure to adjust accordingly. I put mine on the wall to the right of my Ikea Pax Closet.

Hanging your Hats
Once you have all of your supplies ready, it’s time to start hanging your hats! Start by placing the adhesives or mounting putty on the back of each hook (or cup hanger). Then, stick the hooks onto the wall in whatever design you like — straight across in rows of varying heights is always a good option! Once everything is securely stuck to the wall, it’s time to hang the hats! You can either tie decorative ribbons around each hat and hang them from their loops or use clothespins secured by ribbon for an eclectic look. Just make sure they are spaced out evenly so they don’t get too crowded. And voila! You’re done!
Creating your own DIY hat wall gallery is an easy way to organize and display all of those fabulous hats that are currently cluttering up your closet. With just a few basic supplies and some creative thinking, you can transform any space into an eye-catching display that adds style and personality to any room. So what are you waiting for? Get creative, show off those fabulous hats, and enjoy showing off your new DIY hat wall gallery!
Easy 5 Step Process
- Choose a space in your home for your hat wall gallery
- Gather hats of various shapes, sizes, and colors
- Decide on a layout for your hats
- Hang the hats on the wall using nails or hooks
- Take pictures of your hat wall gallery and share with friends and family
Enjoy your hat wall, fashionista!