
Hi friends! My name is Jennifer and today I’m going to show you how to start a WordPress blog using SiteGround!
Over the last few years my life has changed completely thanks to blogging and influencing.
Before starting LoveJenMarie, I worked a full time 9-5 job that I was extremely unhappy in, I knew something had to change.
I knew I wanted to be creative, work for myself AND make money, so I started a blog, Pinterest, Instagram and started creating content.
Thanks to Pinterest, I’m able to Drive 2 Million Views a Month to my account.
At first, the whole concept was totally foreign to me; but when I heard that it could be an amazing source of income with a small initial investment, there was no going back. I had no idea where to start, but I learned that you could easily create your own blog quickly and simply through SiteGround.
Today I’m here ready to show you exactly how simple it is start your own WordPress blog on SiteGround! So let’s get started…
What is Self Hosting?
Self Hosting is a form of running your own website or application by setting up a server and network yourself through a self hosting site like SiteGround.
Instead of using a Platform as a service such as Wix, for example, you have more control over your content and safety in case something happens to the platform.
You also have customer service at your fingertips 24/7. You don’t want to take any chances in losing any of the precious blog posts and data you’ve saved on your website.
Basically, without a hosting platform, you wouldn’t have a live website.
What is WordPress Hosting?
From SiteGrounds Website:
“WordPress is a free, open source content management system that needs a hosting environment with MySQL database and PHP language in order to function and make your WordPress-powered website available in the net. When choosing your host you first need to make sure that it covers these basic technical requirements to accommodate the software and then consider additional WordPress-specific services that are included in the hosting plan to give you maximum convenience and peace of mind such as security features, performance boosters and other managed solutions.”
Which Website Hosting Company Should You Use?
If you’ve been doing a little digging already, you may have discovered that there are many different options out there for website hosting.
I personally love SiteGround and in this article I’m going to share the reasons I continue to use it year after year.
Why SiteGround for WordPress?
Self-hosting your blog is so essential if you want full control of what goes on it and be taken seriously by potential brands and companies. I learned this lesson the hard way when my “free” Blogger platform from years ago shut down with no warning, taking all my content along with it!
Luckily, SiteGround offers an easy solution for owning a website at only $3.99/month – perfect timing given that making money through blogging was always part of the plan! Thanks to investing just a small amount in self-hosted webpage ownership, I’m now reaping all sorts of rewards – not least full confidence knowing who’s boss around here 🙂
Here are my top reasons for using SiteGround for WordPress.
1. The Price
SiteGround offers one of the best prices around in the hosting world. You can purchase an annual hosting plan for just 3.99/month which adds up to $47.88/year.
You guys…that is less than $50 for a full year of being able to run your own website. Suchhh a deal!
2. Free Website Transfer
I love this feature. If your blog is currently on another platform or if you signed up through WordPress.com (not self hosted), you can easily transfer everything over to SiteGround in a few clicks.
I personally started one of my early blogs with WordPress.com and that was such a mistake because it was limiting in what I could share and do. When I realized the power of self hosting, I made the switch to SiteGround and I didn’t lose a single thing. Phew.
3. The Best Customer Service
Seriously, the BEST customer service. SiteGround is well-known in the blogging community for their high client satisfaction rate. If they can achieve 98% customer satisfaction rating AND provide inexpensive rates, then you know you can trust them!
They also provide 5 professional domain email addresses to connect to your blog!
They have a live chat support as well and quick email customer service. I LIKE IT!
4. Fast Website Speed
This matters so much. You never want your speed to drop because it means you will get a high bounce rate on your statistics and that affects overall user experience.
You want to make sure all your photos, videos and posts load immediately.
SiteGround uses a plugin called SG Optimizer which helps speed up your site and keep things running smoothly.
As quoted from SiteGrounds website:
“With its powerful caching capabilities and new front-end and image optimization features, it optimizes the performance of your site to the point that many sites experienced between 20% and 500% speed increase!”
HOW TO START A WORDPRESS BLOG ON SITEGROUND
Now that we’ve covered that going the self-hosted route is essential to your success with starting a blog and knowing a free blogging platform that can shut down on you without warning, I’m going to walk you through the basic SiteGround plans where you can start your blog at an affordable price!
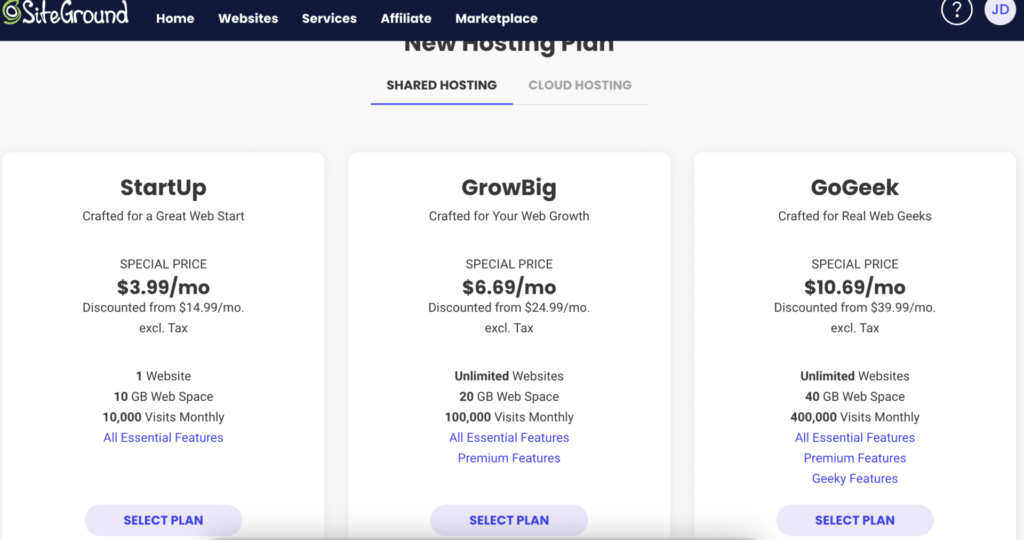
Step 1: Choose the SiteGround Startup Package
If you are new to blogging, I would recommend selecting the StartUp package since it is for only one blog site.
Don’t get overly excited thinking you need to take advantage of the deal and get the GrowBig or GoGeek right off the bat. Trust me, I’ve learned from experience that if you put your time and motivation into one thing, you’ll reap the benefit MUCH quicker. REMEMBER, I’m here to help you succeed.
You can always choose to upgrade later for the extra features.
When I started earning $3-5k a month from my blog AND had more than 10,000 monthly visits, THEN I decided to go with the extra features.
Step 2: Plan Details
On this step, you can decide how many months you want to sign up for. Each of these are paid upfront as a one time payment.
My suggestion is to go with the 12 month plan to see how your blog goes the first year (and I KNOW, it’s going to go great, because you’re here to succeed RIGHT?!) If you’re really motivated, choosing longer plans does offer more of a discount.
PLUS, this is the BEST deal if you’re just starting out.
No matter which plan you decide to go with, these are all low-cost options so you won’t be breaking the bank!

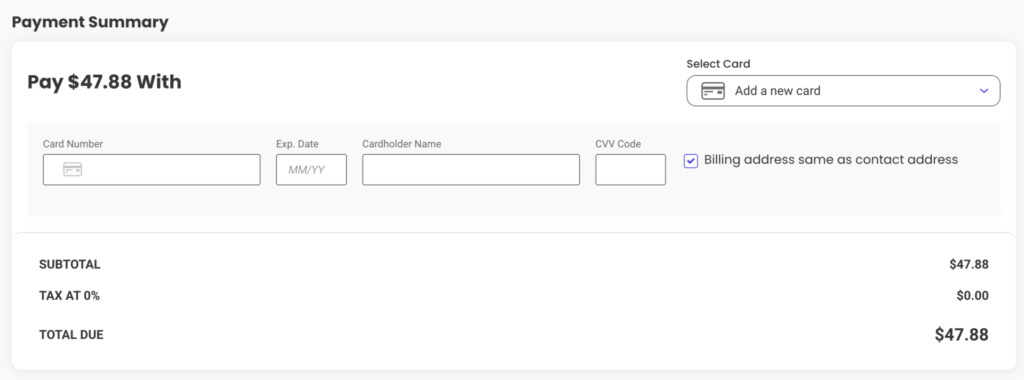
Step 3: Payment Summary
After choosing this plan, you’ll see that you only end up paying $47.88, again, less than $50 just to have your very own live website with SiteGround!
Step 4: Connect Your Domain Name
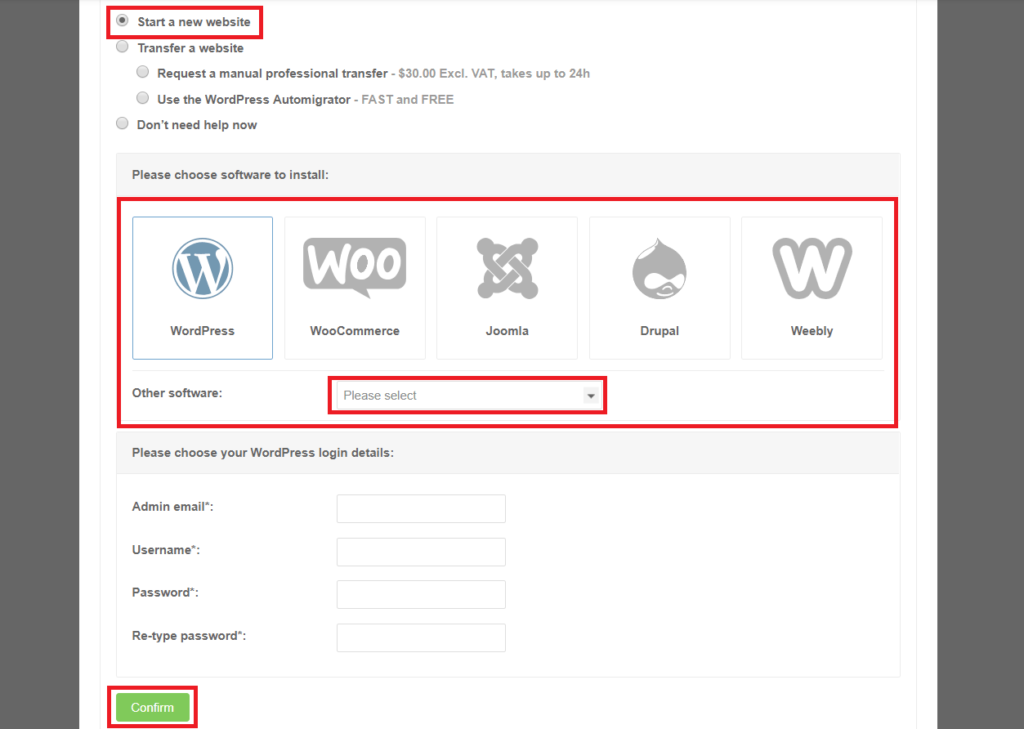
This is the exciting part! It’s time to connect your domain now. The first step is to “start a new website”. If you’re transferring a website from another platform you can do that here as well.
Select WordPress and enter some basic details as shown below.
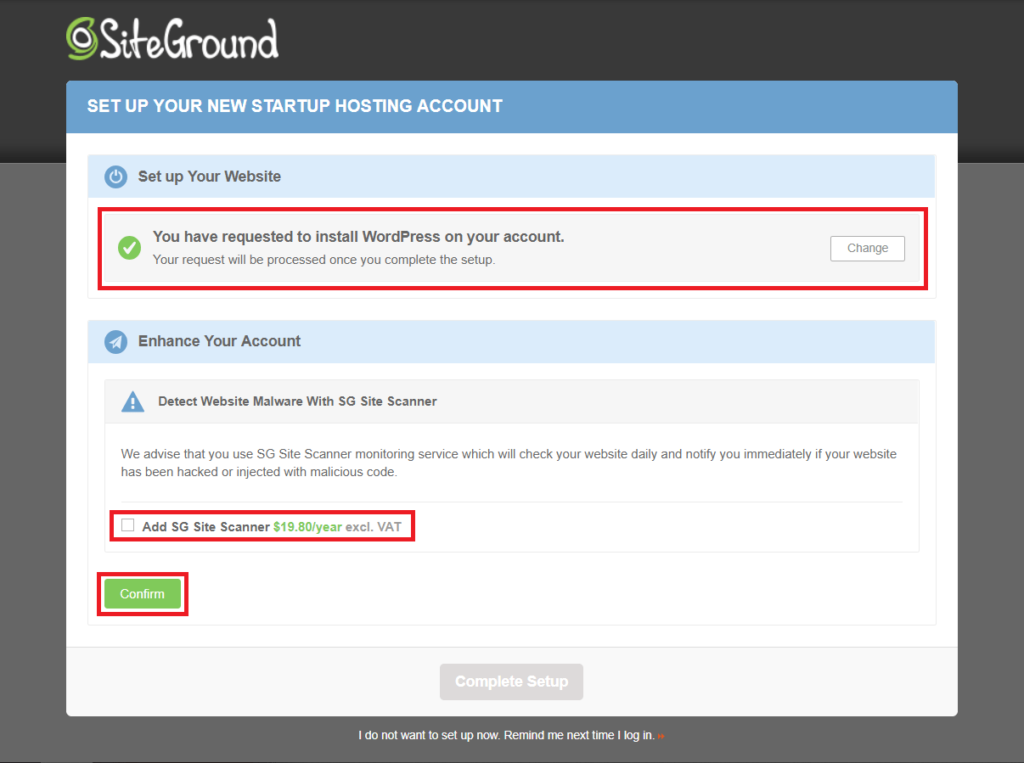
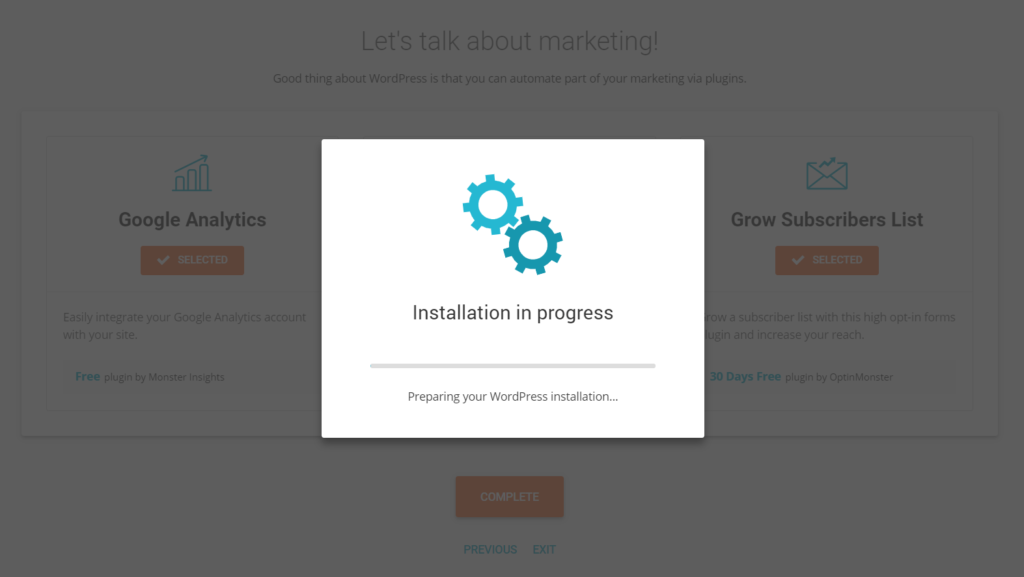
After you click Confirm, accept the Terms and Conditions and click Complete Setup. This will begin the WordPress Installation.
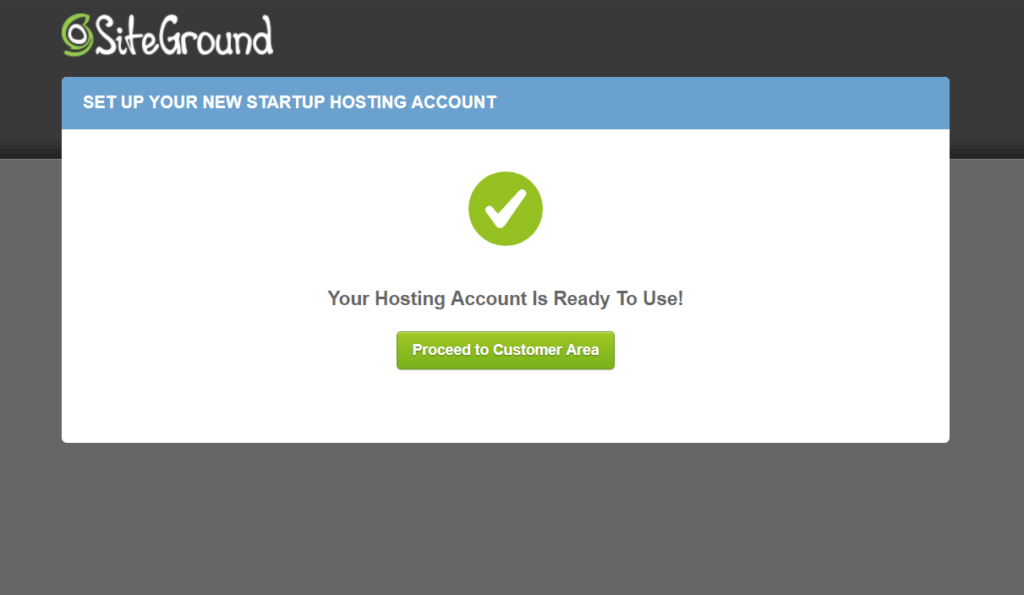
Your Hosting Account is Now Ready to use! You can proceed to the customer area.
Once you go to your dashboard, click the tab that says “My Accounts” >> “Go to Admin Panel”. Once you click that, you’ll see this page:
Step 5: Install WordPress Powered by SiteGround
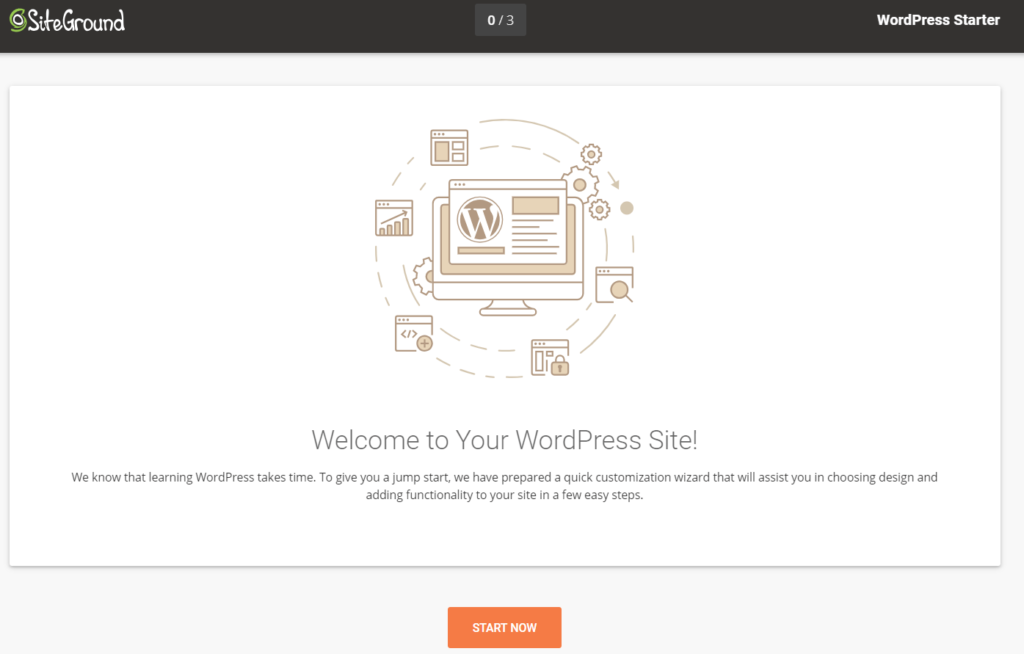
Woohoo!! Now that you’ve made the investment to start your blog hosting with SiteGround, the final step is to install WordPress.
WordPress is the blog platform that you will actually be working in to publish your posts and design your site.
SiteGround makes this super easy with their 1-click WordPress Installation button.
Once you’ve clicked it, wait until WordPress is installed.
You will be prompted to choose a theme. You can choose a simple one WordPress offers. If the template is tied to a certain website building tool, such as Elementor, the plugin will automatically be installed for you so that you get to keep the demo content.
If you don’t want the plugin, click the orange ‘Selected’ button. Just keep in mind that if you choose not to install the plugin, you might get an empty template without any images or text.
If you want to go the inexpensive route, but I’d recommend searching for one on Etsy.
There are so many beautiful options and they are easy to install.

Step 6: Create Your Blog
Now, that you’ve selected the theme you want, you can Start Building – woohoo!
Now you can easily login to your WordPress dashboard instead of logging into Bluehost every time.
You can bookmark this link in your browser so that you can easily access it when you want to log in.
The link to your WordPress dashboard is: https://yourblogname.com/wp-admin
It’s as simple as that! I’m so thrilled that you made the leap to start your blog and start making an income online! It takes effort, but it is worth it!
Feel free to reach out to me anytime with any blogging questions. I’m always here to help!
For SiteGround related questions, their customer service and IT team are amazing at helping quickly and efficiently.
Good luck!


